For accessing your email using Outlook, you can follow these steps and settings-
- Open your Outlook app on your computer
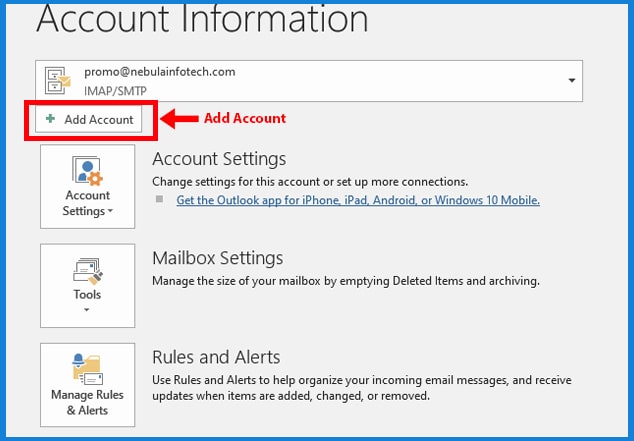
- After opening the app, click on the Add Email Account or alternatively (if you have an older version) navigate to the File tab and click on the Account or Add Account button
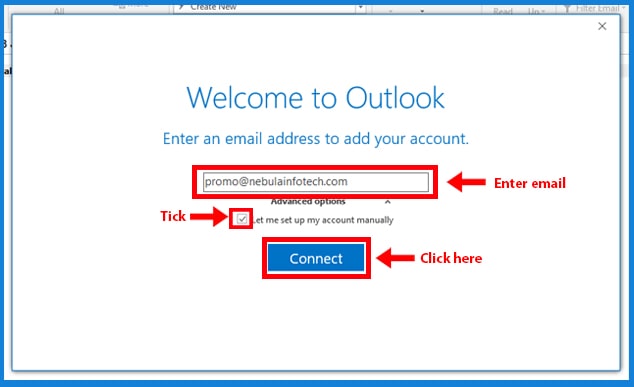
- Now, Add Account tab will appear where you have enable the “Manual setup or additional servers” followed by clicking on the Next button
- Now, select the service tab as POP or IMAP following by clicking on the Next button
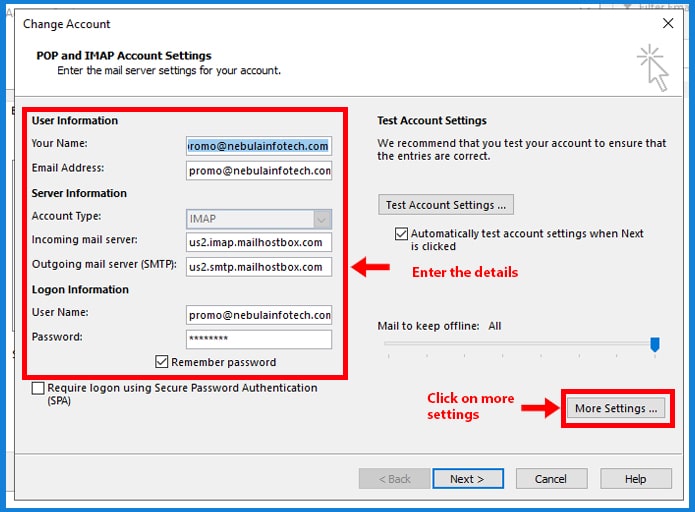
- A settings tab will appear which you have to fill with details as follows-
- User Information– Your name, email address (provided by us)
- Server Information– In the server information, you’ve to select server type as IMAP or POP3 (you can find the difference below) (Recommended: IMAP)
- Incoming Server- enter “us2.imap.mailhostbox.com” for IMAP, or “us2.pop.mailhostbox.com” for POP3 (also the outgoing server for POP uses 995 as port number)
- Outgoing Server- enter “us2.smtp.mailhostbox.com” for both IMAP and POP3
- Login Information- The username you would like to give to this email and the password (provided by us)
- After filling in the details, you’ve to click on the “More Settings” button
- A dialogue box will appear, navigate to the Outgoing servers followed by ticking on the “My outgoing server requires authentication”
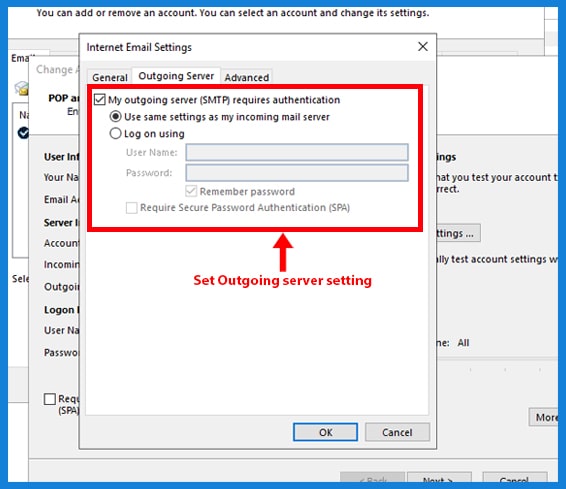
- You have to ensure that the “Use same settings as my incoming servers” is enabled
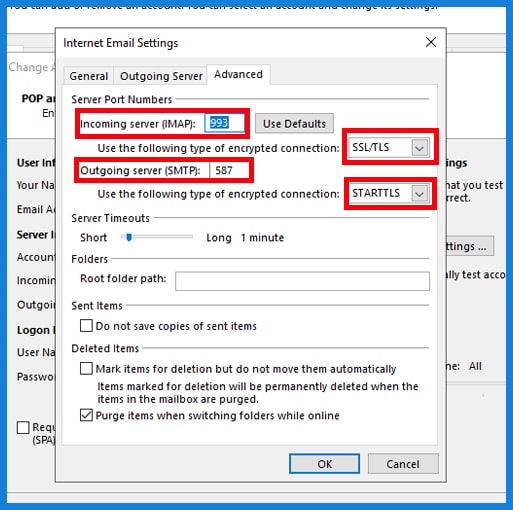
- Now, navigate to the Advanced section and provide the following settings-
- Incoming Server- port number or server settings as 993 and encryption connection as SSL/TLS (some older versions have SSL only kindly select that option) {995 for POP settings}
- Outgoing Server- port number or server settings as 587 and encryption connection as STARTTLS or TLS for older versions
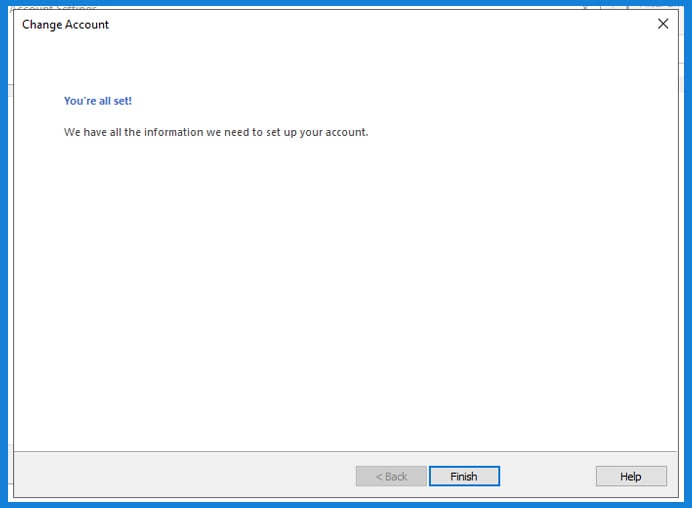
- Now, click on the OK button followed by clicking on the “Test settings” button. You’ll have to ensure two green ticks for checking your settings are right
- After a successful test click on the Next button and you’ll be prompted with “You’re all set” and you’ll have to click on the finish button
- Your account is all set and you can start using your email account using your Outlook app
Note- Some of the settings can differ depending on the version of Outlook you are using, but, the settings and other options will remain the same.
Difference between POP and IMAP
The difference between POP and IMAP is how Outlook handles your data on the server as well as your local device.
POP settings enable the data sent on your email to be downloaded on your local device and the data on the server will be deleted to keep the server space free.
However, this could result in the loss of data if your device is lost or broken, and therefore, it is not recommended.
IMAP settings enable the data sent on your email to be downloaded on your local device and the data on the server will be kept safe. IMAP will synchronize the server data as well as local data to ensure data purity.
How to Access Nebula Business Mail using Webmail?
Apart from Outlook, you can also use webmail to access your emails. If you want to save your time and effort in setting up Outlook.
You can simply use the online webmail to access your email. You can follow these steps to access your email online using webmail-

- Visit the mail host box email website or follow this link-https://us3.webmail.mailhostbox.com/
- Now, enter your username or email ID followed by entering your password and clicking on the login button
- After entering the login button, you’ll be able to access your email using the website.
I am Sunil Tarwara, a seasoned IT professional with over 13 years of hands-on experience in Website Development and Digital Marketing. With a deep understanding of the challenges faced by businesses, I have been trusted by hundreds of clients to achieve their digital goals. I have Master’s degree in Information Technology.
Apart from websites, I like hill stations.